Tuesday, November 30, 2010

Chicken. Feed.

That is right. I said Chicken Feed.  I am gonna go ahead and bet that about 3 of you know what I am talking about, and that is because you are my mom, sister, or biff.

I told you last night about the Christmas Fairy herself, Edna Mae Parrott, and now let me tell you, sister had a claim to fame.  If food had legs, this would have walked her 90 pound butt to hollywood and they would have given her a food show based on the excellent stature of her hair, and her chicken feed.

Oh, and of course, her excellent manners.  Well who am I kidding there are a babillion wonderful things about my great grandmother Edna, who we affectionately called, Mom.  But, back to the chicken feed.

Every year, every single woman in my family goes to the grocery store, buys all the cereal she can get her hands on, and goes home to make chicken feed, the way it's supposed to be made, not this "from a bag" shit.  

It may look like chex mix to you, but trust me, this is a whole new world of snacking.  This, is the down home, do it better version of chex mix. It's chicken feed.

It earned its name from it's likeness to the chicken feed our farming relatives would feed their chickens.

And it earned it's spot on this blog, for being one of the only family recipes, along with chili and peach cake, that I have. 

So thanks, Mom, for the best snack a girl could want, for holiday memories wrapped up in you, and for reminding me where I actually did get this cooking bug from.

Edna's Chicken Feed

(makes 2 roasting pan sized batches)
2 sticks butter
2 cup vegetable oil
2 table worchestershire
2 table garlic powder
2 table seasoning salt
1 table garlic salt
1 box of Rice Chex Cereal
1 box of Corn Chex Cereal
2 boxes (cause it's the best part) of Wheat Chex Cereal
1 bag of pretzels
1 box of Cheerios
1 large container of mixed nuts (almonds, cashews, whatever you like)
1 container of salted peanuts
1 box of cheezits

Take the butter, vegetable oil, worchestershire sauce, garlic powder, seasoning salt, and garlic salt and heat in a pan until all the butter is melted and the spices have partially dissolved (around 10 minutes) 

We use disposable roasting pans for this.  Go ahead and mix all of the other ingredients together until well combined.  Then you are going to evenly coat both pans full of cereal in the sauce.  Toss VERY well, and put in a 275 degree oven for 2 hours, tossing every half hour.
Store in an airtight container for up to 2 weeks.

Chicken feed, in Edna's everyday china.

Do you know any recipes from your great grandmother?  

Love,

Whit

Monday, November 29, 2010

Tis the Season...

After a weekend full of tryptophan (or the Trippy T as I like to call it...) and family bonding with the Finlaws, (that's future, not effin')  I came back on a mission.  

It was time.


My Christmas tree, bless her little heart, used to belong to my great grandmother.  Edna was practically a Christmas fairy.  She had a Christmas tree in every room in her home, and she took extreme pride in her ability to have them all up before the Turkey came out of the oven on Thanksgiving.  I like to give Thanksgiving some time to pass, you know, until the day after...

You. Hussy.

He keeps guard.

 You know, sexy lighting, and normal flash...

She's a lady of the lights.
And every time I pull that precious tree out, with her pines falling out, worn from years of use and love, I shed a tear for the Christmas fairy that I miss so much. 

Then I dance with everything I have to jingle bell rock.  Don't even get me started when Amy Grant starts singing Emmanuel... That's the ball game.


Here is hoping you had a warm, happy, safe and healthy Thanksgiving.  I hope you have a memory to pull out the day after to remind you just how lucky you are, like I do.

Love,

Whit

Thursday, November 25, 2010

BBT: Leftovers - The Pumpkin Edition

So here's whats up.  It's Thanksgiving.

Happy flipping Thanksgiving!  I really hope the BBT series served you well on your journey to a great Thanksgiving - it certainly has served me well to write all of that information down.  The next time I have amnesia, I think I'll be all set on how to throw a Thanksgiving bash.

Since I know you already have made your menues, and recipes for the big day may be too late to add to your table - let's start talking about tomorrow.  What in the world do we do when we are tired of just eating turkey / pumpkin / stuffing?

Boo, I got you.

First things first, I have a babillion cans of pumpkin left in my pantry. ( I just accidently typed panties...)
awkward much?

Soooo I have left over pumpkin and do not want pie.  What do I do?  Well first things first, you make these cookies.  Then you take a peek at the past pumpkin recipes we have used here.  I guarantee you'll find something to do.

Pumpkin Cookies with Cinnamon Cream Cheese Frosting and Candied Pecans


1 cup sugar
2 sticks unsalted butter, softened
2 tablespoons Maple syrup
2 eggs
1 cup canned pumpkin
1 1/2 teaspoons ground cinnamon
1/2 teaspoon ground all spice
1/4 teaspoon freshly grated nutmeg
Pinch ground cloves
2 1/2 cups flour
2 teaspoons baking powder
Pinch of salt

Cinnamon Cream Cheese Frosting
2 (8-ounce) packages cream cheese (softened
1 cup confectioners sugar
1/4 cup milk
1 tablespoon vanilla extract

Candied Pecans
2 cups whole pecans
1/2 cup brown sugar
1 tablespoon cinnamon
1/2 stick butter

Preheat the oven to 350 degrees F.

In a mixer fitted with a paddle, cream the sugar and the butter until light and fluffy.


Add the maple syrup and eggs.


Mix to incorporate. Add the pumpkin and mix to incorporate. Sift together the flour, baking powder, salt, cinnamon, allspice, nutmeg and cloves.


Add the dry ingredients to the batter and mix well. Drop rounded tablespoonfuls onto ungreased cookie sheets.


Bake for 10 minutes, or until lightly golden brown around the edges. Cool on racks. When cool, ice with the cream cheese frosting.


For the Frosting: In a mixer, fitted with a paddle, add the cream cheese. Beat until light and fluffy. Beat in the powdered sugar until smooth. Add milk and vanilla. Beat until smooth. If frosting is too thick, thin with a little more milk. Fold in the lemon zest. When cookies are cool spread with some of the frosting.


For the Candied Pecans:  In a non-stick skillet, toast the pecans on medium heat for 2 minutes, just until you can smell them.  Then add the butter, brown sugar, and cinnamon and cook until the sugar is dissolved and has coated all the pecans. 


Pour out onto a piece of parchment paper and spread them out to harden. 


Once hardened, place on top of the frosted cookies.


And let the season of overeating, begin!

Love,

Whit

Wednesday, November 24, 2010

BBT: gravy...condiment?

Yea, I know.

It's so much more than a condiment.

It's Thanksgiving day in liquid.  It's the smell of fall, it's playing with your cousins outside, it's the brand new puppy your dad got you as a surprise.

Ok, none of that shit happened for me, but it happened for somebody, right?

And, hey, to me, the smell of gravy means it's time for dinner -  and you know I am not going to hate on that.

Gravy.  Don't you dare. Pull out a can. of gravy.  You might as well not put it on the table.   You might as well say "Who eats gravy?"  Because damnit everyone eats gravy and no one likes the can.  It will take you. 10 minutes tops to make a bang out gravy.  Are you ready?

For some KICK ASS GRAVY?

Kick Ass Gravy

Reserve the fat and liquid from the roasting pan of your bird
1/4 cup flour
2 cups chicken stock
salt
pepper
1 tablespoon fresh chopped sage

Remember that one time when we roasted a 20 pound Sharon? 


When you take your Sharon out of the pan you can do 1 of 2 things.  Regardless, steps one and 2 are as follows:

Remove and solids from the pan (read lemons, onions, garlic cloves, herbs, whatever) Take em out!
Pour the liquid from the pan, either in a fat separator or another container.  (I don't have a fat separator, and I lived to see another day) and so will you.

Now, here is where the 1 of 2 comes in.  Either you have a solid roasting pan, or you don't.  If you do, you are going to use that pan to make your gravy.  If you are like me, and you are using a disposable (gasp) roasting pan, never fear.  Just use a nice heavy bottomed high sided pan.

If you are using a roasting pan, set it on the stove and turn on both burners. (Duh, but just in case you didn't know) 

OK at this point, all the liquid is out of your pan. Add 1/4 cup of the fat that was released from the bird.  (It's the top layer of the liquid that looks yellow/clear as opposed to brown)

To the fat, add 1/4 flour.  Stir to incorporate over medium heat and cook for about 1 minute to make sure the flour taste cooks out.  Then start adding the brown liquid (AKA NOT MORE FAT) or cooking broth that was release from the bird, approximately 2 cups.  stirr with a whisk to make sure there are no bits of flour left.  Once this starts to thicken, start adding your chicken stock (2 cups) Let this cook down for 10 minutes and season with salt and pepper and finish with the fresh sage.


I am sorry about the lack of pictures, but you are just going to have to trust me on this one.  It is some damn good gravy.  Now go and throw away that can, for the love of Pete!

Love,

Whit

BBT: Cranberry... Condiment?

I mean,

 I hate calling anything a condiment.  But. 

...cranberry and gravy, are the condiments of Thanksgiving.

In my haste on Sunday, I wasn't really able to take a bunch of pictures because I was in the kitchen by myself busting out a 20 pound turkey, stuffing, sweet potatoes, cranberry chutney, and gravy.  So, these condiments, sort of got the shaft in the photo department. My B!

But the good news is, I can still tell you about them!

You are, under no circumstances, ever. Allowed. to use canned cranberry, anywhere near me.  Got it?  It's pretty simply, and it doesn't take much to make a good cranberry chutney, so GO! read forth and cranberry.


Cranberry Chutney
1 cup water
3/4 cup sugar
12 ounces fresh cranberries
1 cup sliced apples
1/2 cup apple cider vinegar
1/2 teaspoon ground cinnamon
1/4 teaspoon ground nutmeg
1/8 teaspoon ground allspice

Combine all ingredients in a pot and simmer on low- medium heat for 30 minutes, or until the cranberries burst and it turns thick and coats the back of a spoon.

The end.  That is how easy that was.

So you are mother effin welcome and so help me Martha if you use a can of cranberry I will vomit instantly.

Ok, so maybe that was way harsh...

Love,

Whit

Tuesday, November 23, 2010

BBT: Thanksgiving for friends!

Bitch, Be Thankful! Thanksgiving for Friends finally came and went in the whirlwind that it always does.  A wine and food blur.  An amazing, wine and food blur.  

See, the way it works in Casa Mobraham, is that everyone brings something: a favorite family recipe, local beer, a fail proof dessert.  Then we sit around and eat like pigs and wish we had worn stretchy pants.  Why is it again that we aren't wearing stretchy pants?!?

Since we have a wee baby little apartment, we used the party room in our high rise to seat everyone, and it worked out just fine.  I hear that a lot - I have too small of a place to entertain.  Well, improvise.  Surely you can all have tapas so that everything can be eaten standing?  Or may you just don't care because there is turkey and a boat load of casseroles, and they will find a pillow and be fine!  Don't let that stop you from having a friendsgiving!


Local food serves as a place holder

Arrangements made with leftover pumpkins

I really hate to throw these out without one more good use!

Obviously, one table was not big enough for all of us, but a simple runner helps to hide the make shift dinner table.

Jen, she's the apple of my eye you know.

I used a mix of my great grandmother's china and my standard plates to give it a homemade feel.


Georgia insisted.

Ok I am sorry. That is a turkey. It's butter. It's a butter Turkey.

Taylor, Emily and Kaylin

Georgia O'Keefe, our Trainer Laura (yes, she is redic.) and Jen

I used mason jars for all condiments: read Cranberry Chutney, Gravy, and Cinnamon Whipped Cream


They are obviously ragging on Ethan about something...

Gorge.
I hope your Thanksgiving celebration is centered around the true meaning of this holiday: No surprisingly it is not about amazing fattening food and stretchy pants, but in fact, it is about recognizing your blessings and spending time with those who love you.   Whether it's your nearest friends, your extended family, or just your cats.  (What, I am so grateful for mine!)

And it's about stretchy pants.  Who am I kidding?

Love,

Whit

Monday, November 22, 2010

BBT: Turkey

Oh bitches, we are getting down to the meat of Thanksgiving, literally!  I don't know about you, but I am so thankful, because yesterday, we celebrated with our nearest and dearest friends, and the bird. was. PERFECT!  You'll hear all about Thanksgiving for Friends tomorrow, but today, let's focus on the that big fat beautiful bird! 

First things first, I had to wake my turkey up to help!

What, the, flip, Whitney. It is 8:30 on a Sunday.  Look at that HAIR! It's alive.
Now, Let's start from the beginning: What kind of bird to buy?  Whelp, it depends kids.  This is a fresh 20 pounder.  I don't believe in frozen birds unless it's truly necessary, because mine always seem to take too long to thaw.  I like that puppy thawed and ready for me.  Some people debate on buying prebrined birds, kosher birds, range free, yadda yadda.  My thought is that you should get the freshest farm bird you can within your financial limits.  (But I don't mess with ANYTHING that has the word PRE in it...)

I picked this old gal up on Friday night.  I named her Sharon. Because it's the giving season and Sharon is Carin' if you know what I'm sayin.  So, Sharon has been kept cool in the fridge, in a pan so that if any of her juices leak out, it's not going to poison the rest of our food.  Sharon was rinsed thoroughly inside and out.  Make sure to reach in BOTH ends of Sharon, and take out the innards bag and the neck.  Some people use those parts for gravy, I don't think it is necessary. 

So for the sake of easiness. Take out Sharon's junk, rinse her inside and out, and pat her dry.  Then, liberally salt and pepper the inside of Sharon. 

Then, I stuffed Sharon with some aromatics. 


2 lemons, 2 onions, 1 orange, 4 cloves of garlic, 2 sticks of celery and a bundle of Rosemary, Sage and Thyme.  Reserve a few sprigs of each herb to use for herb butter.


1 stick of butter, rosemary, sage, thyme and lemon zest to put under the skin of the bird.

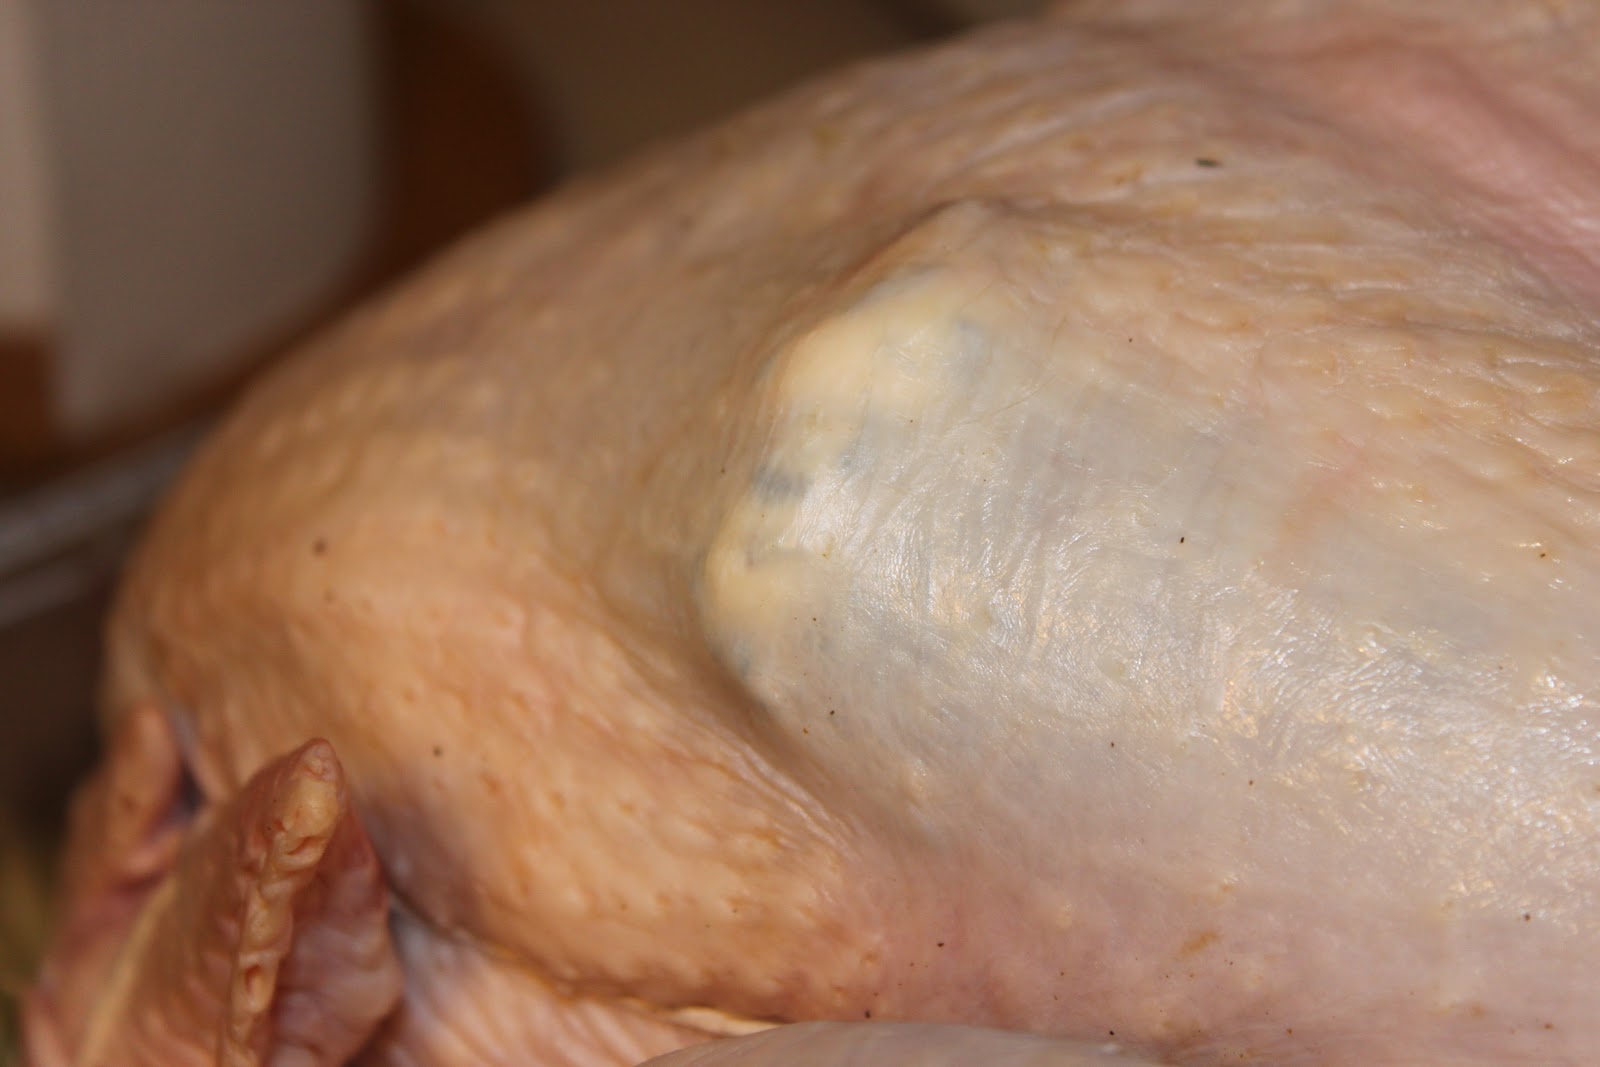
To put the herb butter under the skin, slide your hand under the skin and above the flesh to create a pocket.

What, a breast.

Stuffin' Sharon
She's all stuffed!
Now, let's take a minute to talk about the tiny plastic thermometer that comes already stuck in Sharon.  Do not, for the love of Salmonella, trust a piece of plastic to tell you when your bird has reached 165 degrees.  Use a meat thermometer, or even better, a digital instant read thermometer.  Just pull that plastic thing out, and throw it away.


Like this beaut!
Alright so at this point, your bird should be ready to truss.  NOTE: I truss my bird before I put the herb butter under the skin or season the outside of the bird. I do this because you'll be turning Sharon over a few times, and I don't want to make an even bigger mess than I already am.  So, shall we truss Sharon?

First things first, cut yourself a really long piece of kitchen twine. At the top of the breast, locate where the neck used to be.  Then hook the twine like so in the photo, and pull the ends of the twine around the breast towards the back of the bird, above the wings and legs.
Like so!

Now, you'll want to tie yourself a really good knot to keep the breast in place.

After your knot is tied, take the ends of the twine and hook the turkey legs.  Cris cross the stings over one another and pull the strings (bringing the legs together) towards the front of the bird, like below.

Making sure that when you do so, you grab the wings of the bird in that little hook.  Then flip the bird over, and tie in a knot on the backside.

After you've tied the knot, pull the strings in the opposite direction of where I am holding them in the photo, towards the back of the bird, and flip the bird back over.

And from the back end, loop up the extra skin from the bottom of the bird, and tie it around the legs, completing the truss.
CONGRATS! You just trussed a bird!

Now remember how we made those pockets under the skin of the bird. Let's butter him.

Place the butter under the skin and above the flesh, spreading the butter as far to the front as you can.

Smooth out any butter lumps on the outside of the skin by pressing to distribute.


All buttered.  It's ok if she's lumpy, because the butter will melt in the oven, making a nice crisp skin.

Now, you are going to take ANOTHER stick of unsalted softened butter, and rub it all over the bird.
This is not the time to worry about the fact that you used 2 sticks of butter on a relatively lean meat.  It is Thanksgiving.  I am not a briner of birds, I am a baster.  And this 2 sticks of butter is going to keep the breast juicy and tender, as well as crisp the skin.  Just listen to me, and stop gasping already!

Season her up REAL GOOD with salt and pepper.
Now it's time to get down to business. I know you have all sorts of questions: What do you put in your roasting pan? How long and and what temperature do I cook my bird? How often do I baste my bird? Do I cover it or leave it uncovered while cooking? Well, boo. I got you.

Generally, I put whatever I have put in my bird, on the outside of my bird, therefore in my roasting pan I put 2 cloves of garlic, some onion, lemon, and celery. No herbs, they'll just burn on you.  I also put a little bit of chicken stock down there to give me something to start with. Sometimes, the bird doesn't release a lot of liquid til the end of roasting, and you want to be able to baste it.  

I cook my bird at 375 until my thermometer reads 165. 

Below is a formula of the amount of time you can expect a turkey to cook, depending on it's size.

Multiply the weight of your turkey in pounds by 15 to determine the total number of minutes to cook your turkey.

For example, if your turkey is 20 lbs, like Sharon was:

20 x 15 = 300 total cooking minutes, or 5 hours (300/60)  Now, my bird was done before this.  Typically, I start checking the temperature after 2 hours of cooking to see where we are.  Sharon actually only took 4 hours, and I think I know why.  BECAUSE I PUT HER IN THE OVEN AT ROOM TEMPERATURE.  That's right, she was setting out on the counter for 2 hours to come to room temperature before she entered the oven.  This does 2 things.  It keeps your oven temperature steady, and it starts the cooking process right away, instead of having to bring the bird from cool to hot in the oven.

How often to baste Sharon?  Once on the hour, every hour, until the last hour, when I baste every 15 minutes.  I firmly believe that the end of the cooking process is where the bird gets dry, but if you keep basting her, she'll keep her moisture.  I leave the bird uncovered until it has browned ALMOST to the color I want.  (For me, this took 2 hours.)  Then I cover with foil, and continue to baste until the last hour, when the foil is removed, and it's basted every 15 minutes.

When checking the temperature of your bird, make sure that you check the thickest part of the thigh, without touching the bone.  This will give you the most accurate read.  When your bird has reached 165 degrees internally, then take it out of the oven, and let it sit, uncovered, for 15 minutes before you cut it.  Trust me, I know it's hard, but the juices will run out and you'll have a dry bird if you don't wait. So do it.

And then, your Sharon should look like this:
GLORY!

I know.  It's breathtaking. Bitch, be Thankful. 
Love, 

Whit